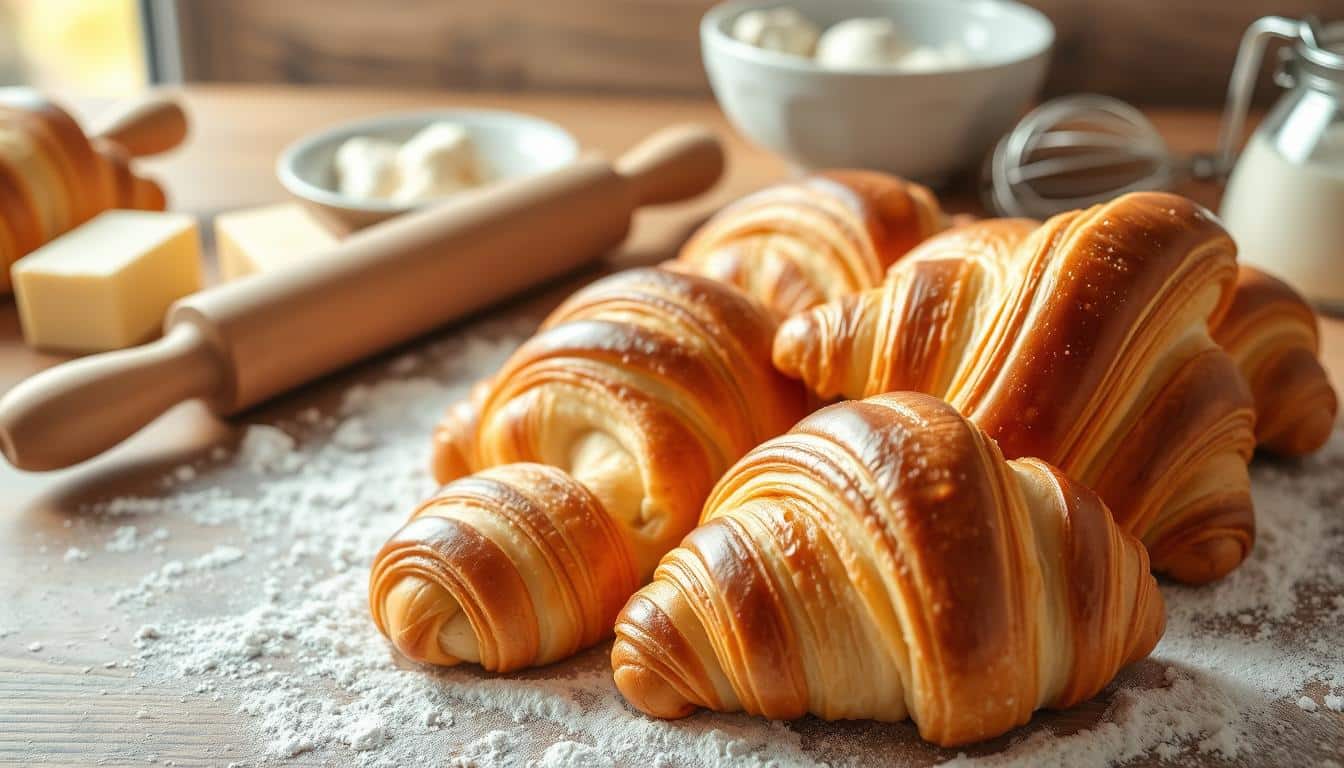
Every kitchen has its big challenge, and for many, making homemade croissants is it. My first try is a memory I cherish. It was a mix of butter, flour, and patience that turned my kitchen into a French bakery.
Making flaky croissants is more than a recipe; it’s an art. It needs precision, passion, and practice. This guide will make it easy for beginners to learn.
You’ll learn about lamination and how to get that golden, buttery look. It’s perfect for weekend bakers or those who love cooking. You’ll turn simple ingredients into amazing pastries.
Table of Contents
Understanding the Art of French Croissants
Explore the world of croissants, where French pastry-making turns simple ingredients into culinary wonders. These buttery treats are more than breakfast food. They show off culinary skill and cultural tradition.

The story of croissants is long and interesting. It starts with the 13th-century kipferl, a pastry that became the flaky croissants we love today.
Origins of the French pastry
Croissants aren’t just French. They come from Austrian baking traditions, like the kipferl. By 1839, French bakers made this pastry into the croissant we know. For those interested in other baked goods, check out this Supreme Croissant: Art, Technique, and Flavors for more insight into perfecting croissants.
What Makes a Perfect Croissant
- Golden-brown exterior
- Delicate, honeycomb-like interior
- Pronounced buttery flavor
- Crisp, flaky layers
Basic Principles of Lamination
Lamination is key to the flaky layers. It involves folding butter into the dough, creating layers that puff up when baked.
| Lamination Step | Purpose |
|---|---|
| First Fold | Initial layer creation |
| Second Fold | Increased layer complexity |
| Final Fold | Maximum layer development |
Today, American bakeries use these French techniques. They import special French flours and master the art of making croissants.
Essential Ingredients for Authentic French pastry

Making the perfect French pastry starts with choosing top-notch ingredients. Knowing how each part works together is key to getting those flaky, buttery layers right.
The core of a great buttery treat is its ingredients. European-style butter is the top pick for bakers. It has more fat and flavor, making the croissant taste better and feel softer.
- Flour Selection: Mixing bread flour and all-purpose flour is key. A mix of 400 grams of bread flour and 200 grams of all-purpose flour works best.
- Butter Quality: Choose European-style butter with at least 82% butterfat for the best taste and flakiness.
- Additional Essential Ingredients:
- 6 grams active dry yeast
- 60 grams sugar
- 10 grams salt
- 270 grams warm water
- 70 grams warm milk
Keeping the temperature right is important when mixing ingredients. Make sure it’s no warmer than 23°C (73.4°F). Mix for just 15 minutes. You want a dough that’s smooth and slightly puffy, but not too airy.
Choosing the right ingredients is vital for making great buttery treat at home. Go for quality, and you’ll be on your way to making delicious pastries in your kitchen.
Equipment and Tools You’ll Need
To make perfect buttery treat at home, you need the right baking tools. The right tools are key to getting that flaky, buttery texture. Let’s look at the essential tools and equipment for your croissant-making journey.
Essential Baking Equipment for buttery treat Making
Every croissant baker needs basic tools. Your basic baking tools should include:
- High-quality mixing bowls
- Sturdy rolling pin for manual dough preparation
- Baking sheets with parchment paper
- Sharp pastry brush
- Bench scraper for dough manipulation
Professional-Grade Tools to Elevate Your Baking
For better buttery treat making, consider professional tools. A pastry sheeter can make your dough even and thin. This is key for authentic croissants.

Temperature Control Precision
Keeping the temperature right is key in buttery treat making. Digital thermometers help track dough and room temperatures. The Brød & Taylor Folding Proofer lets you control temperatures from 70 to 195 degrees Fahrenheit. This ensures your dough proofs perfectly.
| Tool | Temperature Range | Purpose |
|---|---|---|
| Digital Thermometer | 32-482°F | Precise dough temperature tracking |
| Hygrometer | 20-90% Humidity | Measuring proofing environment moisture |
Choosing the right baking equipment is important for making croissants. Start with quality basics and add more as you get better.
The Role of Butter in Croissant Making
Butter is the key to making buttery treat truly special. It’s what turns a simple pastry into a heavenly treat. Choosing the right butter is essential for that flaky texture we all love.
Kerrygold unsalted butter is a top pick for croissants. It has 82% fat, making it perfect for creating layers and flavor. For bakers, the buttery block is more than just an ingredient; it’s the heart of a great croissant.
Butter Selection Criteria
- Fat content of 82-85%
- Minimal water content
- Cold and pliable consistency
- Neutral or cultured flavor profile
To make the perfect butter block, you need to be precise. Cut the butter into 1-inch pieces and mix it with a bit of flour slowly. Aim for a smooth mix without air pockets.
| Butter Type | Fat Content | Best for Croissants |
|---|---|---|
| European-style Butter | 82-85% | Excellent |
| Regular Butter | 80% | Good |
| Cultured Butter | 82% | Unique Flavor |
When working with butter, temperature is key. Keep it cold but soft, around 55-60°F. This helps create up to 300 layers in your dough, giving you that flaky, shattering texture.
Making the Perfect Détrempe (Dough Base)
Creating a great croissant starts with the détrempe, the dough base. It’s the foundation of your pastry. Learning how to make this dough will improve your baking skills. You’ll get results that are as good as those from a bakery.
Essential Mixing Techniques
When making your croissant dough, being precise is important. Start by mixing your ingredients carefully to activate the yeast well. Here are the key steps:
- Combine dry ingredients first
- Gradually add liquids
- Knead until the dough is smooth
- Avoid overmixing to keep the gluten structure right
Initial Fermentation Process
Dough proofing is key for flavor and texture. During the first fermentation, your dough will change a lot. Here’s what you should aim for:
- Room temperature rise: 45-60 minutes
- Refrigeration: 4-12 hours
- Target volume increase: 1.5 times original size
Temperature Control Strategies
Keeping the temperature steady is vital for yeast activation and dough development. Use these professional tips to help your croissant dough reach its best:
- Use a precise digital thermometer
- Keep ingredients at consistent room temperature
- Monitor ambient kitchen conditions
- Create a stable proofing environment
By using these detailed techniques, you’ll make a strong and tasty détrempe. This will help you make amazing homemade croissants.
Mastering the Butter Block (Tourrage)
Making the perfect butter sheet is key to delicious laminated dough for pastry. The butter block, or tourrage, needs precision and the right temperature for flaky layers.
- Select high-quality, cold European-style butter
- Maintain butter temperature between 10-15°C (50-59°F)
- Use a butter sheet that is consistent and smooth
- Aim for an 8-inch square shape
To make the butter block, spread cold butter between parchment paper. You need a perfect 8-inch square, about 1/2 inch thick.
| Butter Block Parameter | Recommended Specification |
|---|---|
| Butter Temperature | 10-15°C (50-59°F) |
| Shape | 8-inch square |
| Thickness | 1/2 inch |
| Chilling Time | 30 minutes |
Chilling is key for the right butter temperature. Chill your block for 30 minutes before adding it to dough. This keeps the butter cold and pliable, essential for flaky layers.
Success in butter block making comes from keeping temperature steady and texture smooth. With practice and patience, you’ll get it right.
The Lamination Process Step by Step
Mastering folding techniques is key to making perfect pastry. The lamination process turns simple dough into a flaky, layered masterpiece. This is done by adding butter carefully and folding the dough in specific ways.
Professional bakers use two main folding techniques: the letter fold and the book fold. These methods help create the layers that make croissants so delicate.
First Turn: Building the Foundation
The first turn is vital for starting the layering process. Traditional methods aim for 27 layers of butter. Modern methods focus on being efficient.
- Roll the dough into a rectangular shape
- Apply the butter block evenly
- Perform a precise letter fold
- Chill the dough for 30 minutes
Second Turn: Increasing Complexity
In the second turn, you keep building layers through careful folding. This stage is key for the croissant’s flaky texture.
| Technique | Layer Development | Complexity |
|---|---|---|
| Letter Fold | 27 layers | High |
| Book Fold | 10 layers | Moderate |
Final Turn: Perfecting the Layers
The final turn is where you perfect the croissant’s texture. Aim for 81-243 layers by managing your folding technique well.
Refrigerate your dough for at least 1 hour after the final turn. You can also freeze it for later use. This helps keep the delicate layers you’ve worked on.
Shaping Your pastry
Mastering pastry shaping takes your baking to the next level. The crescent shape is key to these tasty pastries. It’s a skill every home baker should learn.
To start, you need a dough that’s been laminated well. Here’s what to do:
- Roll your dough into a 13″ x 18″ rectangle
- Trim edges cleanly with a pizza cutter
- Cut the dough into precise triangles
- Create a small 1-inch notch in the wide end of each triangle
Rolling with consistent tension is vital. Start at the wide end and stretch the dough towards the tip. This creates a tight, flaky crescent shape.
Chocolate croissants need a different approach. You’ll make rectangular packets filled with chocolate. These also show off the layering but with a chocolate surprise.
- Pro tip: Keep your dough cold to maintain butter layers
- Work quickly to prevent butter from melting
- Use a light touch when handling the delicate dough
Getting the crescent shape right takes practice. Don’t worry if it’s not perfect at first. Each batch will help you get better.
Proofing Techniques for Perfect Rise
Croissant proofing is key to making those flaky, light pastries. It’s all about mastering yeast fermentation and dough rise. This can turn your homemade croissants into something truly special.
The Science of Proofing
Proofing is more than waiting for dough to grow. It’s a precise process where yeast makes the dough airy. The right conditions are essential for that perfect rise.
Signs of Proper Proofing
- Noticeable volume increase (approximately 2X original size)
- Soft, pillowy texture when gently pressed
- Slight jiggle when the tray is moved
- Indentation remains when lightly touched
Optimal Proofing Conditions
| Condition | Recommended Setting |
|---|---|
| Temperature | 80-90°F (26.6-32.2°C) |
| Humidity | Around 80% |
| Proofing Time | 2-2.5 hours in proofer |
| Room Temperature Proofing | 3.5-5 hours |
Common Proofing Mistakes to Avoid
Be careful of these common mistakes during croissant proofing:
- Under-proofing: Croissants will be dense and lack volume
- Over-proofing: Dough becomes weak and loses structure
- Proofing in drafty or cold areas
- Inconsistent temperature during fermentation
Remember, patience is key in dough rise. Create a warm, humid environment. Let the yeast do its magic. Your reward will be perfectly risen, light, and airy croissants that will impress even the most discerning pastry lovers.
Baking Temperature and Timing
Mastering croissant baking needs careful oven temperature control and timing. The right steps turn your pastry into a golden-brown delight with flaky layers.
Start by preheating your oven to 425°F. This high temperature creates a crisp exterior and helps the layers expand quickly.
- Preheat oven to 425°F
- Prepare an egg wash by beating one egg with 1 tablespoon water
- Brush croissants carefully with egg wash for a glossy finish
In the first 15 minutes, the oven’s high heat produces quick steam. This is key for the croissant’s puffy, layered look. Then, lower the oven to 350°F.
Keep baking for 10-15 more minutes until the crust is golden-brown. Look for signs: the croissant should show no raw dough between its layers.
| Baking Stage | Temperature | Duration |
|---|---|---|
| Initial Baking | 425°F | 15 minutes |
| Final Baking | 350°F | 10-15 minutes |
Pro tip: Every oven is different. Use an oven thermometer to check your oven’s temperature accurately during baking.
Troubleshooting Common Croissant Problems
Croissant baking can be tricky, even for experts. Knowing the usual problems helps make flaky croissants every time.
Butter Leakage Challenges
Butter leakage is a big worry in croissant making. Here are some tips to help:
- Air bubbles can be popped gently with a toothpick
- Dust butter leaks with flour to seal weak spots
- Keep the room temperature below 20°C (68°F) to avoid butter absorption
Structural Integrity Concerns
Getting the croissant shape right needs focus. Beginners might need 3-4 tries to get it. Important things to remember include:
- Use flour with about 11% protein content
- Butter should have high fat, around 82%
- Proofing should be between 24-26.5°C (76-79°F)
Texture and Flaky Texture Challenges
Getting a flaky texture needs careful attention. Look out for these problems:
- Under-proofing can make butter leak during baking
- How you knead affects dough’s stretchiness
- Resting times are key for dough structure
By learning these tips, you can solve common croissant problems. This way, you’ll make delicious, flaky pastries every time.
Homemade French Croissants
Equipment
- Large mixing bowls
- Rolling Pin
- Parchment paper
- Pizza cutter or sharp knife
- Bench scraper
- Digital thermometer
- Pastry brush
- Wire rack
- Pastry sheeter (optional for professional-level lamination)
- Egg wash bowl
Ingredients
- – 400 grams Bread flour
- – 200 grams All-purpose flour
- – 6 grams Active dry yeast
- – 60 grams Sugar
- – 10 grams Salt
- – 270 grams Warm water
- – 70 grams Warm milk
- – 82-85% Fat European-style butter such as Kerrygold, cold
- – 1 Egg for egg wash
Instructions
- **Make the Détrempe (Dough Base):**
- – Combine the bread flour, all-purpose flour, yeast, sugar, and salt in a large bowl.
- – Gradually add the warm water and milk. Mix until the dough forms a smooth, slightly puffy texture.
- – Knead for about 10 minutes to develop the dough’s gluten. Let it rise at room temperature for 45-60 minutes, then refrigerate for 4-12 hours.
- **Prepare the Butter Block (Tourrage):**
- – Cut cold European-style butter into 1-inch pieces. Mix it with a small amount of flour to create a smooth, pliable butter block.
- – Form the butter into a 8-inch square about 1/2 inch thick. Refrigerate for 30 minutes to keep the butter firm but soft.
- **Lamination Process:**
- – Roll the chilled détrempe into a large rectangle. Place the butter block on top and fold the dough around the butter.
- – Perform a letter fold to encase the butter, then chill the dough for 30 minutes. Repeat the folding process for two additional turns.
- – Refrigerate for 1 hour after the final turn to allow the dough to firm up.
- **Shaping the Croissants:**
- – Roll the dough into a 13″ x 18″ rectangle and trim the edges for neatness.
- – Cut the dough into triangles and make a small 1-inch notch at the wide end of each triangle.
- – Roll the triangles tightly from the wide end to the tip to form croissants. Place on a baking sheet.
- **Proofing:**
- – Allow the shaped croissants to proof in a warm, humid environment for about 2-2.5 hours or until they double in size. They should feel soft and slightly jiggly when gently pressed.
- **Baking the Croissants:**
- – Preheat the oven to 425°F. Brush the croissants with an egg wash (1 beaten egg mixed with 1 tablespoon water).
- – Bake for 15 minutes at 425°F to create a crisp exterior, then reduce the temperature to 350°F and bake for another 10-15 minutes, or until golden-brown.
- **Cool and Serve:**
- – Allow the croissants to cool for a few minutes on a wire rack. Enjoy them fresh with butter or jam for the ultimate indulgence.
Notes
– Make sure the dough remains cold throughout the process to maintain the butter layers.
– If you’re new to croissant-making, practice and patience are key. Don’t worry if your first batch isn’t perfect; each time will improve your technique. Enjoy the process, and remember: the more you practice, the more masterful your croissants will become!
FAQ
How long does it take to make croissants from scratch?
Making croissants takes 1-2 days. The dough needs time to rest and chill. This includes fermentation, lamination, and proofing. You’ll spend about 10-12 hours, mostly waiting for the dough to rest.
Can I freeze croissant dough for later use?
Yes, you can freeze the dough at different stages. After lamination, wrap it in plastic wrap for up to 1 week. Thaw it in the fridge overnight before shaping and proofing. You can also freeze shaped croissants and proof them straight from the freezer.
What type of butter works best for croissants?
Use high-fat European-style butter for croissants. Look for butter with 82-85% butterfat, like Kerrygold or French butters. This type of butter makes the croissants flaky and rich.
Why are my croissants dense instead of flaky?
Dense croissants can come from overworking the dough or using butter that’s too warm. Make sure your butter is cold but soft. Do 3-4 lamination turns and proof in a warm, humid place until they’re puffy.
Can I make croissants without a stand mixer?
Yes, you can make croissants by hand. Use a large bowl and a wooden spoon or Danish dough whisk. Mix carefully to avoid overworking the dough.
How do I know when croissants are perfectly proofed?
Perfectly proofed croissants are puffy and light. They should be about 50-75% bigger and feel soft. When pressed gently, they should spring back slowly. Overproofed croissants will be flat and soft.
What’s the difference between a butter block and détrempe?
The détrempe is the initial dough made with flour, water, yeast, and other ingredients. The butter block is a sheet of butter prepared separately. It’s folded into the détrempe during lamination.
Can I make croissants with regular all-purpose flour?
You can, but professional bakers prefer a mix of bread flour and all-purpose flour. Bread flour has more protein, which helps with texture and rise. A good mix is 2/3 bread flour to 1/3 all-purpose flour.
Conclusion
Making French pastry is an art that makes your baking skills stand out. Creating homemade croissants needs patience, precision, and a deep understanding of the techniques. Your work in lamination, proofing, and baking is more than just making a pastry. It’s about joining a culinary tradition.
With your new skills, you can make croissants as good as those from professional bakeries. You’ll learn to balance butter, dough, and technique, showing you the beauty of French baking. Every croissant you make is a chance to learn and get better, with small improvements showing up with practice.
Not many home bakers get perfect flaky croissants right away, with only about 10% succeeding on their first try. Your openness to trying new things, learning from mistakes, and improving your skills will make you unique. Whether you’re making a classic butter croissant or trying new flavors, your baking will keep getting better with each batch.
Enjoy the journey, savor the delicious outcomes, and remember that every skilled baker began where you are now. They were curious, determined, and eager to make something amazing in their kitchen.