When it comes to comfort food, few dishes capture the essence of crispy, golden, and savory indulgence quite like tater tots. Whether you’re preparing them as a side for your main meal or simply enjoying them as a quick snack, these little potato morsels are hard to resist. But, have you ever wondered how to get them just right? From the perfect texture to the ideal seasoning, making tater tots can be an art form. In this article, we’ll guide you through the steps for making homemade tater tots that will rival any store-bought version, and we’ll also explore some fun variations and tips for customizing this beloved snack.
Table of Contents
What Are Tater Tots?
Tater tots are small cylinders of grated potato, typically fried to a crispy, golden brown. They were invented in the 1950s by the Ore-Ida company, who originally aimed to use leftover potato scraps in a new, innovative way. Today, they are a household favorite, especially when paired with dipping sauces like ketchup, ranch, or even cheese sauce.
These crispy, crunchy snacks have evolved beyond their original form and now come in many variations, including sweet potato tater tots, gluten-free versions, and even ones stuffed with cheese. But no matter the variation, the key to a great batch of tater tots lies in getting the right balance between crispy on the outside and soft on the inside.
The Perfect Tater Tot Recipe: Step-by-Step Guide
To make tater tots that are crispy on the outside and soft on the inside, you need the right ingredients and technique. Here’s a simple recipe that you can follow at home.
Ingredients for Homemade Tater Tots
| Ingredient | Quantity |
|---|---|
| Russet potatoes | 2 pounds |
| Salt | 1 teaspoon |
| Pepper | 1/2 teaspoon |
| Onion powder | 1 teaspoon |
| Garlic powder | 1/2 teaspoon |
| Cornstarch | 2 tablespoons |
| Vegetable oil (for frying) | Enough to submerge tots |
| Optional: Cheddar cheese | 1/2 cup, grated |
Step 1: Prepare the Potatoes
Start by peeling the russet potatoes. These are the best for making tater tots due to their starchy nature, which helps achieve the ideal texture. Once peeled, grate the potatoes using a box grater or a food processor. After grating, place the potatoes in a large bowl of cold water. This step helps remove excess starch, ensuring your tater tots will be crispy when fried.
After a few minutes, drain and dry the grated potatoes thoroughly. You can use a clean kitchen towel or paper towels to absorb any extra moisture.
Step 2: Season the Potatoes
Once the potatoes are dry, it’s time to season them. Add salt, pepper, onion powder, and garlic powder to the potatoes. If you want to add a cheesy twist, you can mix in some grated cheddar cheese at this point. This will give your tater tots a rich flavor that pairs wonderfully with the crispy exterior.
Step 3: Add Cornstarch
To make your tater tots hold together and get crispy, sprinkle in some cornstarch. This acts as a binding agent and also helps to enhance the crispiness of the tots. Mix everything together until the potatoes are well-coated with the seasoning and cornstarch.
Step 4: Shape the Tater Tots
Now comes the fun part: shaping your tater tots! Take small amounts of the potato mixture and roll them between your palms into small cylinders. They should be about 1 inch long and 1/2 inch thick, resembling the classic tater tot shape.
If you prefer a quicker method, you can use a piping bag to form the tots, which will help speed up the process.
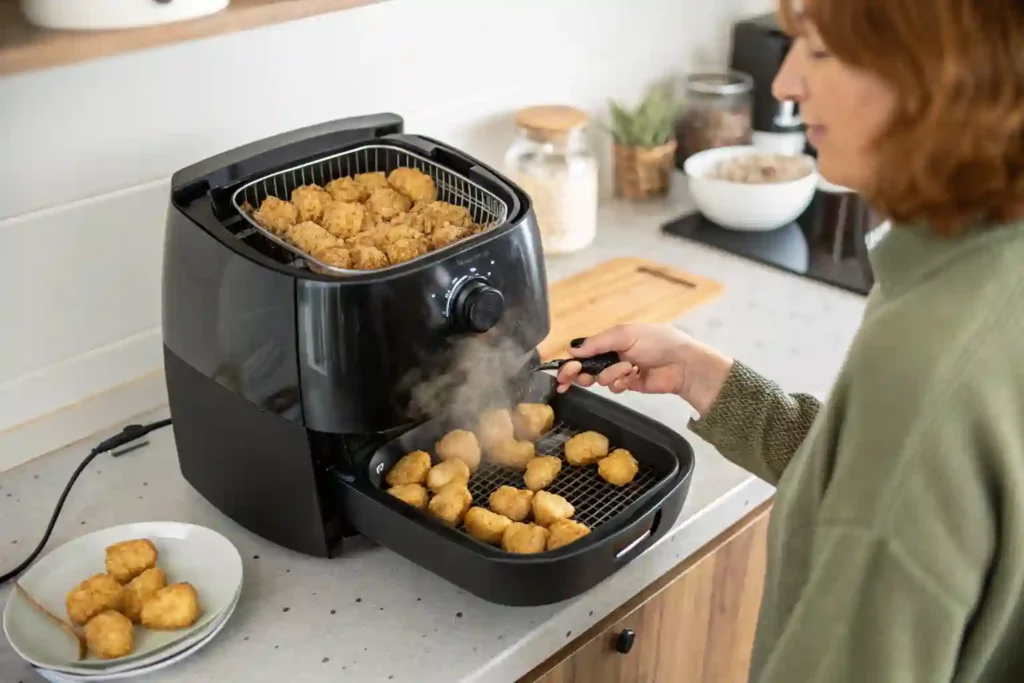
Step 5: Frying the Tater Tots
Once you have shaped all the tater tot, it’s time to fry them. Heat the oil in a deep fryer or a large pot until it reaches 350°F (175°C). The oil should be deep enough to submerge the tots fully for even frying.
Carefully lower the tater tots into the hot oil, a few at a time, and fry them for about 4-5 minutes or until they turn golden brown and crispy. Avoid overcrowding the pot, as this can lead to uneven cooking.
Once fried, remove the tots and place them on a paper towel-lined plate to drain excess oil. You can serve them immediately or keep them warm in an oven set to 200°F (93°C).
Variations on Classic Tater Tots
Although the classic tater tot recipe is a winner, there are plenty of ways to get creative with your tots. Here are a few variations you can try:
- Sweet Potato Tater Tot: Swap out the russet potatoes for sweet potatoes. Sweet potato tots are a delicious and slightly healthier option. To get the best texture, cook the sweet potatoes before mashing them. This could pair nicely with a Frozen Chicken Crock Pot Recipe.
- Cheese-Stuffed Tater Tot: For a cheesy surprise inside, add small cubes of cheese into the center of each tot before frying. This creates a delicious gooey filling that pairs perfectly with the crispy outer shell.
- Spicy Tater Tot: If you like a little heat, mix in some finely chopped jalapeños or a sprinkle of cayenne pepper. The spicy kick can take your tater tots to the next level!
Tips for the Best Tater Tots
Here are some actionable tips to help you make the best tater tots every time:
- Use a Starchy Potato: Russet potatoes work best because their high starch content helps achieve a crispy exterior and a fluffy interior. Avoid waxy potatoes like red potatoes, as they tend to get mushy when fried.
- Double Fry for Extra Crispiness: For an even crispier texture, you can fry the tater tots twice. After the first fry, let them cool for a few minutes, and then fry them again for 1-2 minutes to achieve that perfect golden crunch.
- Freeze Before Frying: If you want to make your tater tots ahead of time, freeze them after shaping. This will help them maintain their shape when fried and reduce the risk of falling apart. Freeze them in a single layer, then transfer to a ziplock bag for long-term storage.
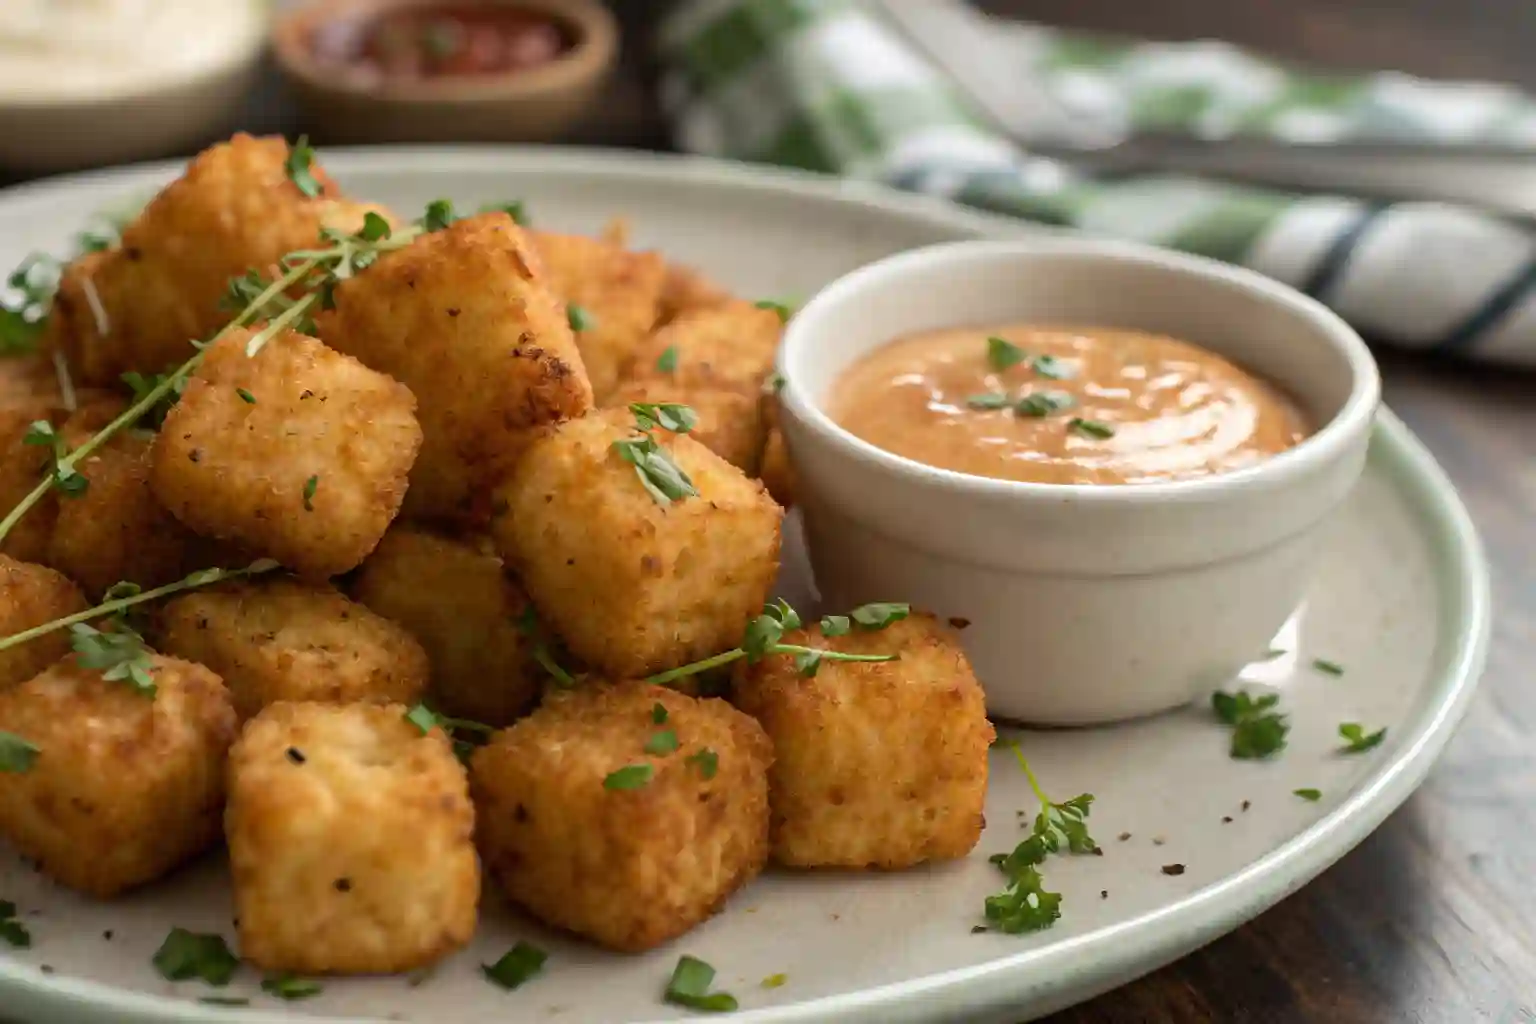
Pairing and Dipping Sauces
Tater tots are incredibly versatile when it comes to pairing and dipping sauces. Here are some of the best options to complement your crispy treats:
- Classic Ketchup: You can never go wrong with a side of tangy ketchup. It’s the ultimate pairing for crispy tater tots and adds a familiar flavor that everyone loves.
- Ranch Dressing: For a creamier dip, ranch dressing is a fantastic option. Its rich flavor complements the crispy texture of the tater tots.
- Cheese Sauce: If you love cheese, serve your tater tots with a rich and creamy cheese sauce. This is especially great for cheese-stuffed tater tots. For those who enjoy homemade dishes, pairing these with a Homemade Chocolate Banana Pudding might bring an exciting dessert to your meal!
How to Make the Perfect Tater Tots from Scratch
Introduction
Tater tots are a beloved comfort food that many people enjoy for breakfast, lunch, dinner, or as a snack. They’re crispy, golden, and delicious—perfect for dipping or serving alongside burgers and sandwiches. But did you know that making tater tots from scratch can be surprisingly easy and much more flavorful than buying them frozen? Whether you’re a first-timer or a seasoned cook, this step-by-step guide will show you how to make homemade tater tots that rival anything you can find in the freezer aisle. So, roll up your sleeves and get ready to dive into the world of tater tots!
How to Make Tater Tots Step-by-Step (continued)
1. Grating the Potatoes
The foundation of any good tater tot recipe is the potato. To start, you’ll need to choose the right kind of potato. Russet potatoes are often the best choice because they have a high starch content, which gives the tater tots their crispy texture. Start by peeling the potatoes and grating them finely with a box grater. The finer the grate, the crispier your tots will be. However, if you prefer a chunkier texture, you can leave them slightly larger.
Once grated, place the shredded potatoes in a clean kitchen towel and squeeze out any excess moisture. This step is critical! Excess water will make the tots soggy instead of crispy. Aim to remove as much moisture as possible to achieve that perfect crunch when they cook.
2. Preparing the Tater Tot Mixture
Now that you’ve prepared the potatoes, it’s time to add the seasonings and binders. In a large mixing bowl, combine the grated potatoes with flour, cornstarch, and seasoned salt. For added flavor, you can incorporate garlic powder, onion powder, and black pepper. These ingredients will not only help bind the tots together but also ensure they’re packed with flavor in every bite.
Next, add egg to the mixture. The egg acts as a binder, holding all the ingredients together while cooking. If you prefer a vegetarian version, you can substitute the egg with a flaxseed egg or a chia seed egg for a similar binding effect.
3. Shaping the Tater Tot
Now that you have your potato mixture ready, it’s time to shape the tots. This is where you can get creative! Take a small spoonful of the potato mixture and roll it between your hands to form a small cylinder. Aim for about 1 to 1.5 inches in length. You can also use a small ice cream scoop to make this process faster and more consistent.
Once you’ve shaped all the tots, lay them out on a baking sheet lined with parchment paper. If you’re planning to freeze the tots for later use, this is the time to do so. Freeze the tots for about an hour to ensure they keep their shape during cooking.
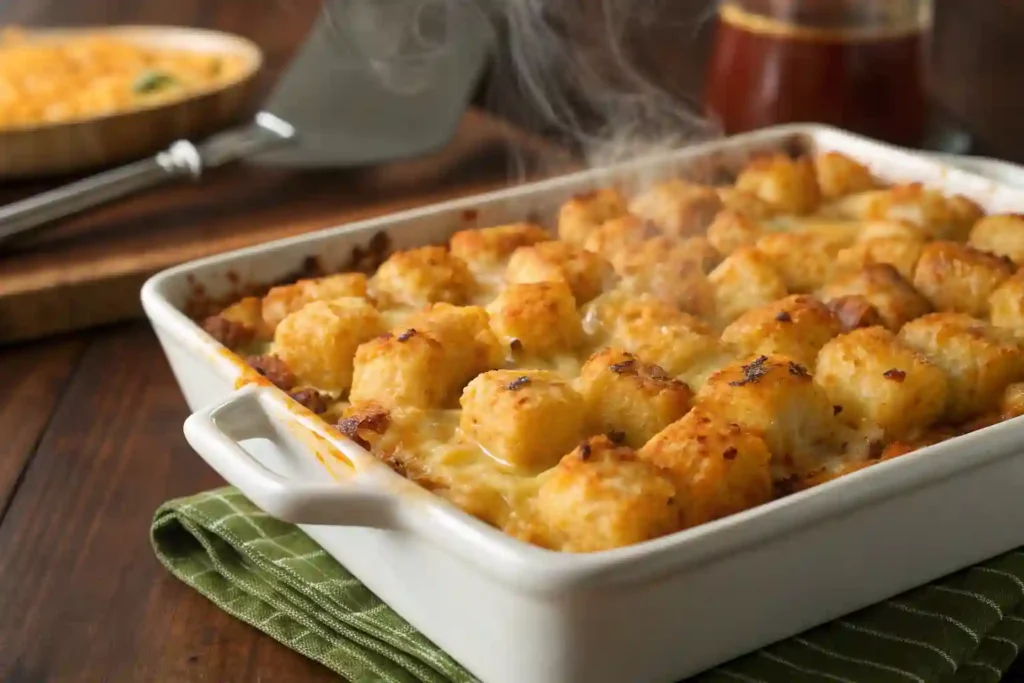
4. Cooking the Tater Tot
You have two options when it comes to cooking tater tots: baking or frying. Both methods result in crispy, delicious tots, but there are slight differences in texture.
- Baking: Preheat your oven to 425°F (220°C). Place the baking sheet with the tater tots in the oven and bake for about 25-30 minutes, flipping halfway through. This method gives you crispy tots without the need for much oil, making it a healthier option.
- Frying: Heat oil in a deep fryer or a large pot to 350°F (175°C). Fry the tots in batches, making sure not to overcrowd the pot. Fry for 3-5 minutes until golden brown and crispy. Drain on a paper towel-lined plate to remove excess oil.
Pro Tips & Variations
While the basic tater tot recipe is amazing on its own, there are a few ways to elevate your tots or customize them to your liking.
1. Add Cheese for Extra Flavor
One great variation is adding cheese to the mix. Sharp cheddar cheese works wonderfully with the potato base. Simply fold in shredded cheese right after mixing the potatoes with the dry ingredients. For a richer experience, you can also melt cheese on top of the tots during the final minutes of baking or frying.
2. Spicy Tater Tots
If you’re a fan of spice, consider adding finely chopped jalapeños or a teaspoon of cayenne pepper to the potato mixture. This will give your tater tots a nice kick without overpowering the flavor.
3. Herb-Infused Tater Tots
To enhance the flavor profile, try adding fresh herbs like rosemary, thyme, or parsley to the mix. These herbs not only add fragrance but also create a savory twist on the classic tater tot.
FAQs About Tater Tots
Can I Make Tater Tots Ahead of Time?
Yes, you can! After shaping the tater tots, place them on a baking sheet and freeze them. Once they are frozen solid, transfer them to an airtight container or freezer bag. You can keep them in the freezer for up to 3 months. When you’re ready to cook, you can bake or fry them straight from frozen. Just add a few extra minutes to the cooking time.
Can I Use Sweet Potatoes for Tater Tots?
Absolutely! Sweet potatoes make a great alternative to regular potatoes. You’ll get a slightly different texture and flavor, but the process remains the same. Sweet potatoes tend to be a little sweeter, so you might want to adjust the seasoning to balance the sweetness.
How Do I Keep Tater Tots Crispy?
To keep tater tots crispy, avoid overcrowding the baking sheet or frying pan. Also, if you’re baking them, a light spray of cooking oil can help achieve a golden, crispy crust. If you’re frying, make sure the oil temperature stays consistent, as oil that is too cool can result in soggy tots.
Conclusion
Making homemade tater tots from scratch is incredibly satisfying and surprisingly simple. With the right ingredients and a little patience, you can create crispy, golden tots that will rival anything from the frozen food aisle. Whether you’re baking or frying, adding cheese or herbs, or even making a batch ahead of time, the possibilities are endless.
So, next time you’re craving a snack, try making your own tater tots! Your taste buds (and your guests) will thank you. The best part? You’ll have complete control over the ingredients, ensuring a healthier and more flavorful option. Enjoy!