Few desserts combine simplicity and sophistication as seamlessly as cheesecake balls . These bite-sized delights are easy to prepare, incredibly versatile, and guaranteed to impress at any event. Whether you’re hosting a casual get-together or a formal dinner party, cheesecake balls are the perfect addition to your menu. In this article, we’ll explore a detailed recipe, creative decoration ideas, and serving tips to elevate your dessert game. Let’s dive into the delicious world of cheesecake balls!
Table of Contents
Ingredients and Instructions for Making Cheesecake Balls
Cheesecake balls are an excellent choice for both beginner and experienced bakers. With just a few basic ingredients and minimal preparation, you can create a dessert that’s as visually appealing as it is delicious.
Ingredients Breakdown
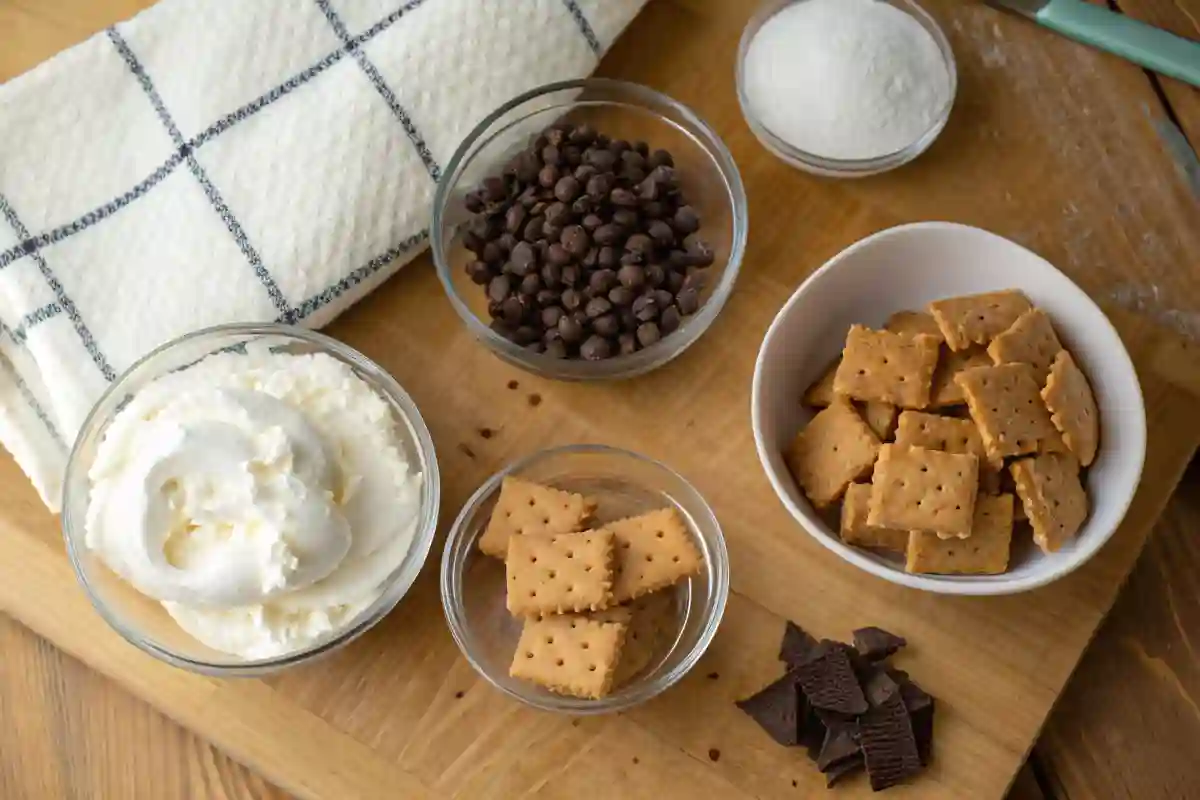
Below is a comprehensive list of the ingredients you’ll need to make cheesecake balls. For best results, gather all your ingredients before starting to ensure a smooth process.
| Ingredient | Amount | Notes |
|---|---|---|
| Cream Cheese | 8 oz | Softened for easier mixing |
| Powdered Sugar | 1 cup | Adjust to taste based on sweetness |
| Crushed Graham Crackers | 1 cup | Used for rolling or as a topping |
| Vanilla Extract | 1 tsp | Enhances the flavor (optional) |
| Chocolate Chips | ½ cup | Melt for drizzling or dipping |
| Decorative Sprinkles | ½ cup | Optional, for added color and texture |
Step-by-Step Instructions
- Prepare the Cheesecake Mixture
Begin by combining the softened cream cheese and powdered sugar in a large mixing bowl. Use an electric mixer for best results, as it ensures a smooth and creamy texture. If you’d like to add extra flavor, include a teaspoon of vanilla extract. - Shape the Balls
Using a spoon or a small ice cream scoop, portion out the mixture. Roll each portion into a ball using your hands. To prevent sticking, lightly grease your hands or chill the mixture for a few minutes beforehand. Arrange the balls on a parchment-lined baking sheet. - Chill the Balls
Place the baking sheet in the refrigerator for at least 1 hour. Chilling is crucial as it helps the balls firm up, making them easier to coat and decorate later. - Decorate Your Cheesecake Balls
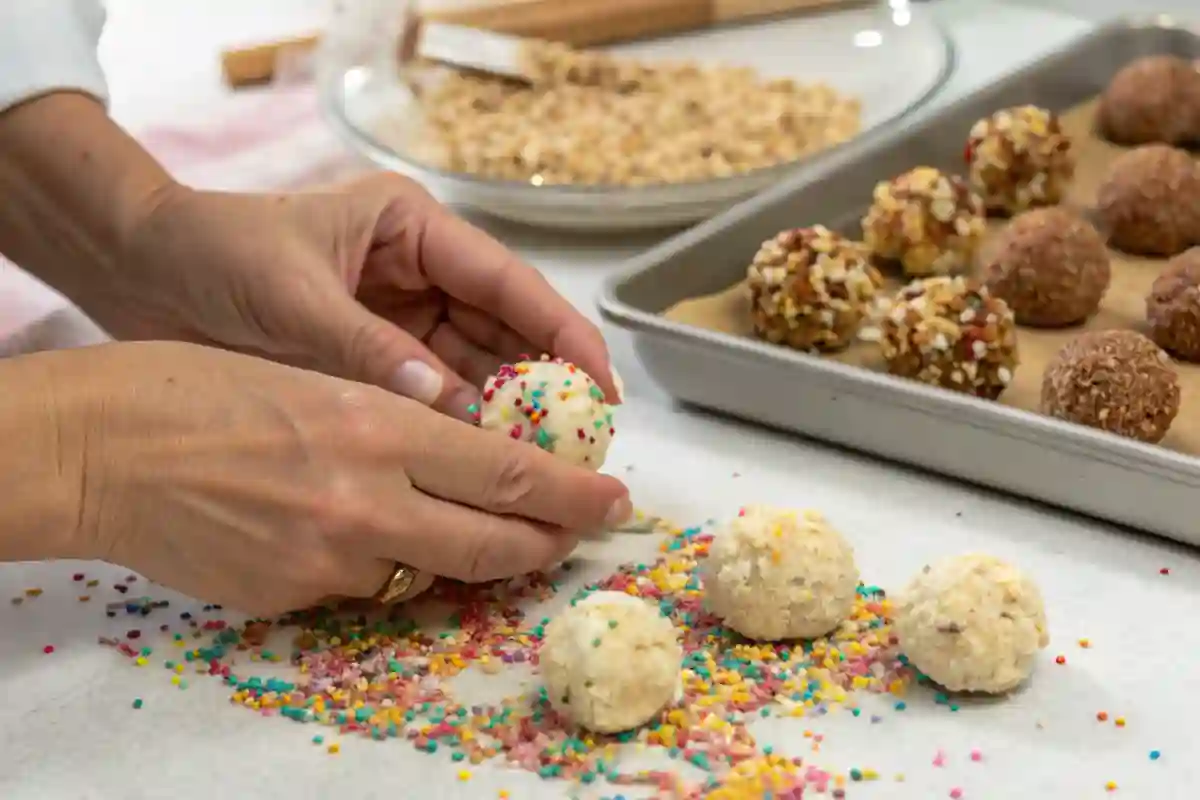
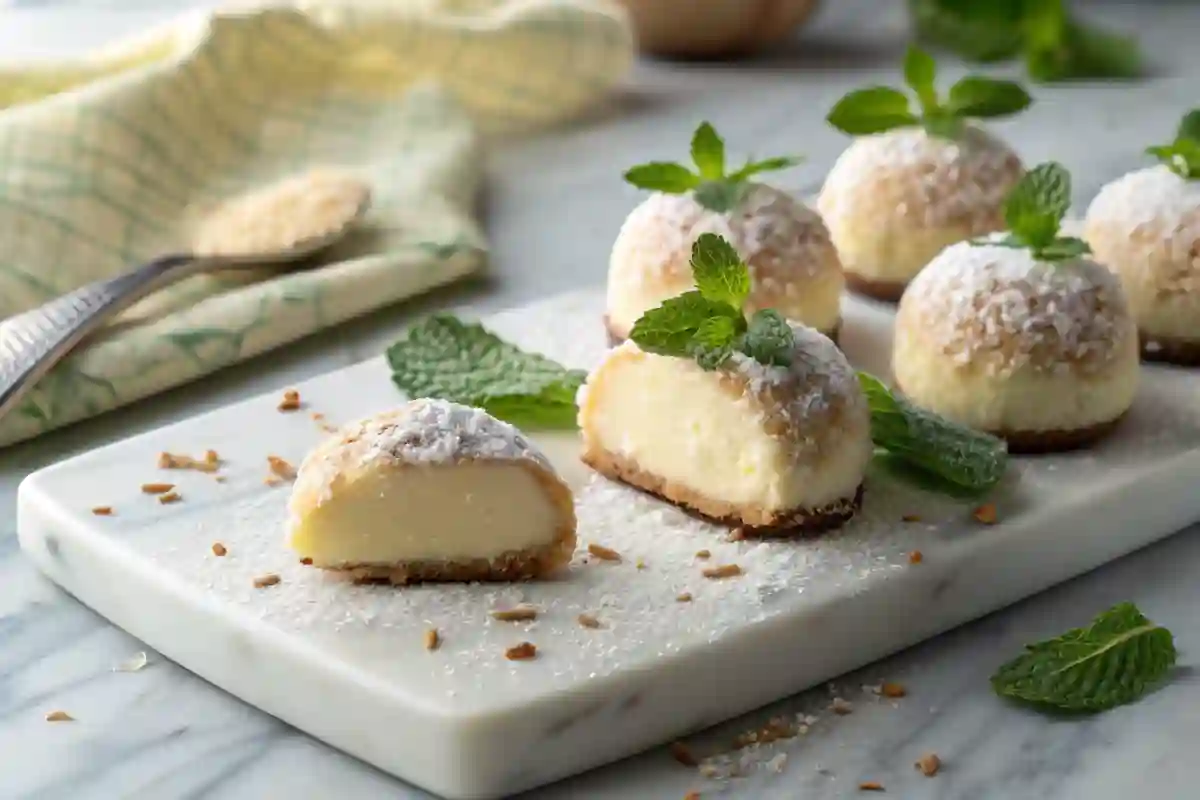
Roll the chilled balls in crushed graham crackers for a classic look. Alternatively, melt chocolate chips and dip the balls, letting any excess drip off before placing them back on the parchment paper. Add sprinkles or other toppings before the chocolate hardens for a fun and festive touch.
Creative Cheesecake Balls Platter Ideas
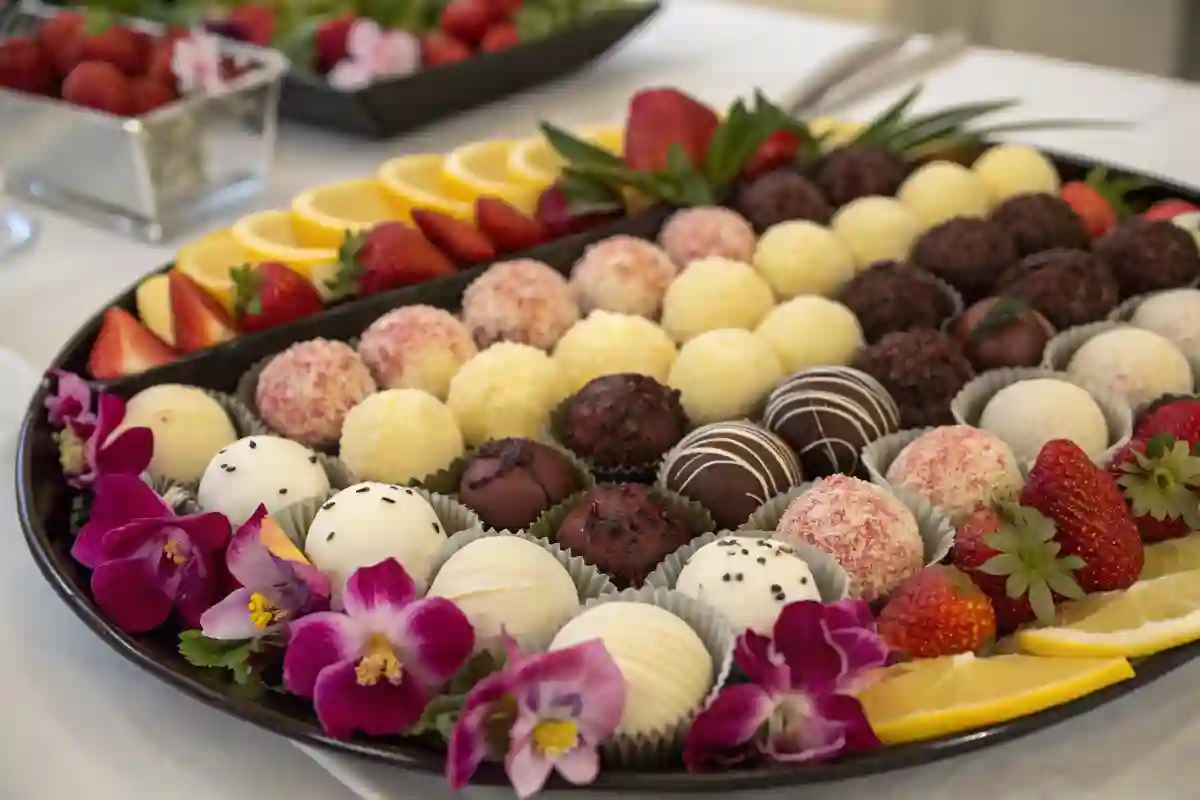
Presentation can transform your cheesecake balls from a simple dessert into a show-stopping centerpiece. A thoughtfully arranged platter not only adds visual appeal but also enhances the overall dining experience.
Ideas for Styling Your Platter
- Themed Arrangements: Coordinate the colors of your cheesecake balls with the theme of your event. For example, use pastel-colored sprinkles for a baby shower or red and green accents for a holiday party.
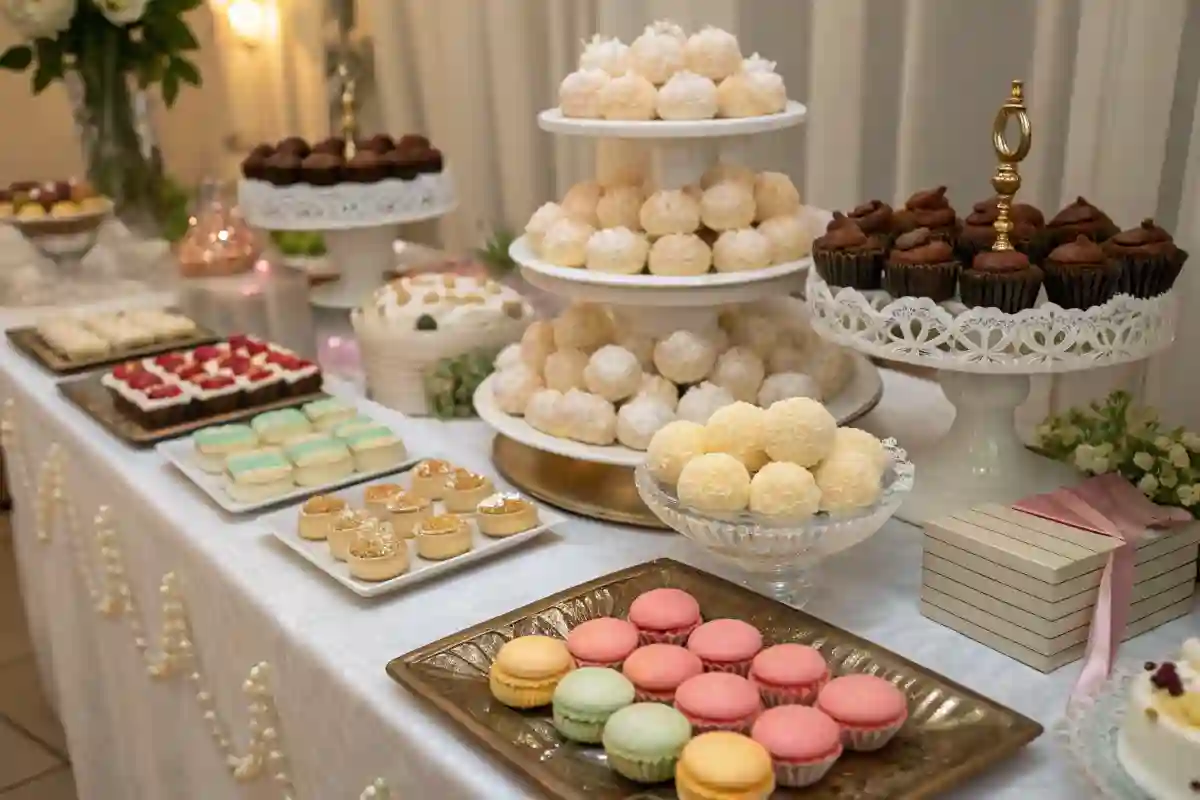
- Layered Displays: Utilize tiered trays or cake stands to add height and dimension to your presentation. This approach maximizes visual impact and saves table space.
- Add Fresh Elements: Complement your cheesecake balls with fresh fruits like strawberries, raspberries, or mint leaves for added vibrancy and contrast.
For additional inspiration, visit our Dessert Preparation and Presentation guide. It offers a wealth of tips on how to make your desserts stand out.
Expert Tips for Decorating Cheesecake Balls
Decorating your cheesecake balls is an opportunity to get creative and showcase your personality. From elegant designs to playful themes, there’s no shortage of ways to elevate these treats.
Decorating Techniques for Any Occasion
- Drizzle with Chocolate: Melt white, dark, or milk chocolate and use a spoon to drizzle it over your cheesecake balls. To create intricate patterns, use a piping bag or a small zip-top bag with a tiny corner snipped off.
- Roll in Textures: For a rustic yet sophisticated look, roll the balls in crushed nuts, shredded coconut, or cookie crumbs. Each option adds a unique texture and flavor profile.
- Customize for Events: Use food-safe edible glitter, gold leaf, or tiny sugar flowers to match the theme of your celebration. These small details make a big impact.
Additionally, explore our Dessert Catering Guide: Tips, Ideas & FAQs for more ideas on how to personalize your cheesecake balls.
Practical Serving Ideas for Cheesecake Balls
Cheesecake balls are not just a treat for the taste buds—they’re also a visual delight. Whether you’re planning a formal dinner or a backyard barbecue, these serving ideas will help you present your cheesecake balls in style.
Serving Suggestions to Impress
- Mini Dessert Cups: Place individual cheesecake balls in small, clear cups or decorative ramekins. Add a dollop of whipped cream and a sprig of mint for a polished look.
- Dessert Boards: Assemble a dessert charcuterie board featuring cheesecake balls, fresh fruits, chocolates, and other sweet treats. This approach encourages guests to mix and match their favorites.
- Seasonal Themes: Adapt your presentation based on the season. For example, use edible flowers and pastel shades in spring, or incorporate cinnamon and nutmeg flavors in autumn.
Enhanced Tips for Making Perfect Cheesecake Balls
To ensure your cheesecake balls turn out flawless every time, keep these additional tips in mind:
- Temperature Matters: Always start with softened cream cheese. Cold cream cheese can result in a lumpy texture, while overly warm cream cheese may not hold its shape well.
- Chill Thoroughly: Don’t rush the chilling process. A minimum of one hour in the refrigerator is essential, but for firmer results, consider chilling them overnight.
- Flavor Experimentation: Don’t be afraid to get creative with flavors. Add cocoa powder, matcha, or even a splash of your favorite liqueur to the cream cheese mixture for a unique twist.
This expanded content ensures comprehensive coverage of every aspect of cheesecake ball preparation, decoration, and presentation. By following these detailed tips and ideas, you’ll create a dessert that not only tastes incredible but also looks stunning on any table. Stay tuned for the second half of the article, where we’ll answer common questions and share more pro tips!
Cheesecake Ball Recipe – Elevate Your Dessert Game
How to Perfectly Serve Cheesecake Balls
Cheesecake balls are versatile and can transform an ordinary dessert menu into a visually stunning experience. From casual dinners to upscale events, serving these treats with flair can leave a lasting impression.
Creative Serving Ideas
- Dessert Boards
Arrange cheesecake balls on a wooden charcuterie board surrounded by complementary treats like fresh berries, chocolate truffles, and assorted cookies. This setup encourages guests to mix and match flavors, creating an interactive dessert experience. - Mini Dessert Cups
For a sophisticated touch, place individual cheesecake balls in clear mini cups or decorative ramekins. Add a swirl of whipped cream and a sprinkle of crushed graham crackers to make each serving a complete dessert.
- Seasonal Presentations
Adapt your serving style to reflect the season. For winter celebrations, garnish with crushed peppermint candy and serve on snowflake-patterned plates. In summer, pair the balls with slices of fresh mango or kiwi for a tropical vibe.
For more inspiration on creating memorable dessert presentations, check out our Ultimate Guide to Cherry Chip Cake, which is filled with tips to elevate your culinary creations.
Pro Tips for Cheesecake Ball Success
Achieving perfection with cheesecake balls requires attention to detail. Follow these expert tips to ensure flawless results every time.
Ingredients and Preparation
- Use Quality Ingredients
High-quality cream cheese and fresh toppings make a noticeable difference in flavor. Opt for premium chocolate and organic fruits for a rich and natural taste. - Maintain Consistency
To ensure uniform sizes, use a small ice cream scoop to portion the cheesecake mixture. This not only creates a professional appearance but also helps with even chilling.
Common Mistakes to Avoid
- Skipping the Chill Step
Chilling the cheesecake mixture is crucial for achieving firm and shapely balls. Without this step, the balls may become too soft to handle during decoration. - Overloading with Toppings
While creativity is encouraged, too many toppings can overwhelm the delicate cheesecake flavor. Aim for balance by using a few well-chosen garnishes.
Cheesecake Balls
Equipment
- Electric mixer or hand whisk
- Mixing bowls (large and small)
- Ice cream scoop or spoon
- Parchment paper
- Tiered tray or serving platter
Ingredients
- 8 oz cream cheese softened
- 1 cup powdered sugar adjust to taste
- 1 cup crushed graham crackers for rolling or topping
- 1 tsp vanilla extract optional
- ½ cup chocolate chips for melting and dipping
- ½ cup decorative sprinkles optional
Instructions
- Prepare the Cheesecake Mixture: In a large mixing bowl, combine the softened cream cheese and powdered sugar. Use an electric mixer to blend until smooth and creamy. Add vanilla extract if desired and mix to combine.
- Shape the Balls: Using a spoon or small ice cream scoop, portion out the cheesecake mixture and roll it into balls using your hands. If the mixture is sticky, chill it for a few minutes or lightly grease your hands. Arrange the balls on a parchment-lined baking sheet.
- Chill the Balls: Place the baking sheet in the refrigerator for at least 1 hour to allow the cheesecake balls to firm up.
- Decorate the Cheesecake Balls: Roll the chilled cheesecake balls in crushed graham crackers for a classic look. Alternatively, melt chocolate chips and dip the balls, letting any excess chocolate drip off before placing them back on the parchment paper. Add sprinkles or other toppings before the chocolate hardens for a festive touch.
- Serve and Enjoy: Once the chocolate has set (if used), serve the cheesecake balls on a platter and enjoy!
Notes
You can also flavor the cheesecake mixture with cocoa powder, matcha, or citrus zest for a unique twist.
These cheesecake balls are best served chilled or slightly frozen for a refreshing treat.
If you want to make them more decadent, consider adding a caramel or chocolate center to each ball before shaping them.
FAQs: All About Cheesecake Balls
Decorating and Presentation
Q: How do I make cheesecake balls visually appealing?
A: Use a mix of coatings like sprinkles, crushed nuts, and melted chocolate for variety. Display them on tiered trays or decorative plates for a polished look.
Q: Can I add color to cheesecake balls?
A: Yes! Use food coloring in white chocolate or mix natural fruit purees into the cream cheese base for vibrant and flavorful options.
Flavor and Customization
Q: What unique flavors can I try?
A: Experiment with matcha powder, cocoa, or citrus zest for distinctive flavors. For a decadent twist, add a caramel or chocolate filling to the center of each ball.
Q: Can cheesecake balls be made gluten-free?
A: Absolutely! Replace traditional graham crackers with gluten-free alternatives, and ensure all toppings are certified gluten-free.
For additional creative dessert ideas, explore our Strawberry Swirl Cheesecake, which offers insights into crafting show-stopping treats.
Storage and Longevity
Q: How long can cheesecake balls be stored?
A: When stored in an airtight container in the refrigerator, they can last up to five days. For longer storage, freeze them for up to two months.
Q: Can cheesecake balls be served cold or frozen?
A: Both options work! For a refreshing summer dessert, serve the balls slightly frozen. If serving cold, allow them to sit at room temperature for 5–10 minutes before serving to enhance their creaminess.
Conclusion
Cheesecake balls are the perfect combination of simplicity, elegance, and versatility. With endless flavor possibilities and creative presentation options, they are an excellent addition to any occasion. Whether you’re a seasoned baker or a novice in the kitchen, this recipe is designed to help you create a memorable dessert that will impress family and friends alike.


